Apple Desk Quick Tip!

Holiday Savings

Saving Money!

Did you know that when you purchase a Panther Rewards Bookstore Gift Card for $250, $500, $750 or $1,000, your Gift Card comes with money added on it automatically- FREE?  For instance, if you purchase a $500 Panther Rewards Gift Card, you get $15 added to it.  You can then turn around and use this Gift Card to purchase an iPad Air (example)  for that special someone and use that additional $15 as savings on the iPad!

Two wonderful things are accomplished with buying smart- first, you save money- bonus, then you are appreciated for your thoughtful gift- double bonus!

 Buy smart, get savings with a Panther Rewards Gift Card.

dollars

MacBook Pro With Retina Displays are in!!

MacBook Pro Retina Display

MacBook Pro Retina Display

Wow!

Come in and get your new 13″ or 15″ Mac with Retina display. The new 13″ Mac with Retina Display now comes in three choices.

  • MacBook Pro 13-inch with Retina Display: 2.4GHz Dual-core Intel Core i5, 128GB   $1,199.00
  • MacBook Pro 13-inch with Retina Display: 2.4GHz Dual-core Intel Core i5, 256GB   $1,399.00
  • MacBook Pro 13-inch with Retina Display: 2.6GHz Dual-core Intel Core i5  512GB    $1,699.00

The new 15″ comes in these choices.

  • MacBook Pro 15-inch with Retina Display: 2.0GHz Quad-core Intel Core i7  256GB   $1,899.00
  • MacBook Pro 15-inch with Retina Display: 2.3GHz Quad-core Intel Core i7  512GB   $2,399.00


Apple Quick Tips

Disabled copy

What to Do When your iPad,  iPhone or iPod is disabled

We recently had someone, a bored students perhaps, come in and create a passcode on our Demo iPod which locked every customer out who was looking at the iPod’s.  After so many tries of entering the passcode, the iPod then became disabled which allowed no one to open it.  How annoying for customers. But, the good news is that there is an easy fix for anyone who has a passcode on their iPad, iPod or iPhone and was locked out.

The first thing you should realize though is this

This process completely wipes your device clean and restarts it. What this means is that any and all of your music, movies and all other data is wiped as well.  Make sure your have all this saved on your Mac/PC before anything like this happens if possible.  iCloud is definitely the preferred choice, then you can just restore your device from iCloud. The very least you should make sure of is that you have synced your device with iTunes which can perform the restore as well.  

However, if you have never synced your device with iTunes and you’re not using the benefit of the iCloud, you can perform this easy trick to unlock your device without restoring data.  It will be like a new device.

First– Shut your device off.

Second– Open iTunes on computer.

Third– Get your charging cable plugged into your computer through the USB port.

Next– Hold down Home Button (Without Releasing) while plugging the other end of charging cable into device. Look for “Connect to iTunes” that appears on device before finally releasing Home Button.

Then– Look for “Device in Recovery Mode” in iTunes on computer, then click ok and restore device.

Below is an Apple Support link that can help walk you through restoring and resetting a passcode with iCloud if you used it to back up. 

Apple Support Link

Apple Quick Tip- Airport Wi-Fi

Airport Wi-Fi

A new problem arose after one of our customers purchased an Airport Base Station for Wireless Networking in their home.  They followed the included Manual Instructions which did not call for getting this setup started using your Mac which turned out to be a missing key component for getting it set up correctly.  Below is a link to Apple Support for a tutorial slideshow on how to set up your wireless network.

Apple Support – Wi-Fi Slideshow

Airport 1

The first step of course is to turn your Mac on! Then plug your Airport into the outlet and open up Airport Utility by opening Finder from your dock.  Scroll down on right and open Utilities.   A window will appear and looks similar to this one above. 
Select the correct device by making sure it is highlighted and continue

Airport2

You are then given the chance to individualize your Airport device by creating a name along with a password to protect your Wi-Fi with security. 

Airport3

Select which set-up you want from the choices of extending your Wi-Fi Zone, replacing it or creating a new one or secondary one.  Then continue.

Airport4

Then, choose your wireless network which may be made easier by showing the name created for it previously.  Continue.

Airport5Congratulations! Click done, your Airport Device is activated.

Friday Apple Quick Tips

printer help2

Helping you through your nightmares of printer issues…

…like adding a new printer.


We recently had a case where a student could not get her Mac to recognize her printer.  A student who has deadlines for handing in papers is desperate and frantic the day before the deadline. You will find these helpful hints to be a good source when you are installing a new printer preferably before that deadline is upon you.

Before you get started on adding a  printer – view link below!

Very Important!

Below are some helpful Apple Support Links to checkout.

Apple Support Printers 101

Adding Wireless Printers

Recommended Wi-Fi Printer settings  

First and foremost when shopping for a new printer- make sure it is compatible with Mac OS X.  

After your well thought out purchase -Before doing anything else, read printer manual, then read it again.   Now you are on the road to becoming mentally prepared to install your printer.

Studiously follow the printer instructions by turning printer on and installing ink cartridges, adding paper as well as connecting printer to Mac.  With Lion and Mountain Lion OS X, you may get a Dialog Box letting you know if your Mac wasn’t able to install a driver if recent updates have been made and new software must be downloaded.  It is at this point that you may have discovered one hiccup installing the printer- so face it right now  The software for installing your new printer is probably out of date!

That said, now you know you may have to go to your Mac’s browser and look for your printer (make and model) Driver which will take the place of the outdated installation CD or downloaded software.  This driver is the printers installation updated software.  First try using the Apple Support link provided below to get that software. If this is not helpful- below the link are the manual installation directions for printer drivers.

Apple page for Printer software

  • ·    You will type in the name of your printer-for instance- Hewlett Packard, Canon, etc. And then the model precisely as it is seen- Deskjet 3050A or PIXMA MG3122 etc., then use the word Driver.  For instance- Search HP Deskjet 3050A Driver or whatever your printer is and look for the manufacturer’s support for printer driver.
  • ·         Once you find the manufacturer website, you may have to select which printer model you have or select driver if offered to select.
  • ·         Then make sure you know which Mac OS X operating system you have, Snow Leopard 10.6, Lion 10.7 or Mountain Lion 10.8. then click download.

After you get that software downloaded onto your Mac which may not automatically open up, select that download to open and choose installation and go through the steps it directs you to.  You may have to refer to the Apple Links above for adding wireless printers.

Check to see if your printer is ready- open System Preference and look in Print & Scan for your new printer. Follow Printer’s manual instruction and print out something for a test. 

You should be good to go.Apple Happy2


Friday Apple Quick Tip- iPad Apps

Apple AppsDeleting or Re-Installing Apps with ease!

Recently, we experienced a customer who was frustrated because they couldn’t delete unwanted apps from their iPad.  We have also had some customers come in who could not get the App they just purchased to work correctly.  Here are some good tips and simple fix-it procedures for working with Apps.


One of the first things you should remember to follow up on is to check the iOS requirements of the Apps you want to purchase or did purchase and the App is having issues.  You can find these at the Apps Store by searching store for the App and selecting it.  You will find the requirements underneath description or Information of App (shown in picture blow).  With some Apps, you may have to click on more info.

iPad Apps

Then you can view the iOS version of your iPad by going to Settings and looking in General, then  About where you will find version in the middle of list.  This will let you know whether the App you are interested or already purchased is compatible with the version you have.  At this point, you should try to see if there are software updates available, which is also in Setting in General then Software Update.  You should always update your software before you purchase new Apps.

Apple wiggle mode

To remove an App you don’t want or one that is giving you trouble and you want to reinstall it simply find the App on your iPad Screen and tap and hold until it starts to wiggle or jiggle (“Wiggle” mode Fun Tip below) .  You will notice an x in the upper corner(see photo at left) which you can tap to delete this App.  If you decide after tapping x that you want to stop deleting the App, press the Home Screen button on the iPad whihc will cancel the delete. 

After you have deleted this App from your Screen, you can re-install it by going to the App Store on your iPad.  If you purchased this App, you can tap Purchased to find it or search App Store.  Then tap install to re-install it.

You now can open the newly re-installed App to see if all the issues you were experiencing are gone.

You can go the link below if you are still experiencing issues.

Apple Support for iPad Apps

Fun tip   Rearranging Apps:

You can rearrange the Apps on a page or from page to page while they are in this “Wiggle” mode by dragging them around.  You can organize them by page like all Game Apps on one page, Apps for Work on another, Apps for travel on another, etc.


Apple Desk Note

Graduation Wish List:

With just two weeks before Finals begin, many Graduating Seniors are starting to think about Graduation Gift ideas because with hard work comes benefits.  Of course, since the Apple Area is conveniently located here on the campus, Apple products are right up there as a desired gift.

At the top of the Apple list is… (Drum Roll Please)Retina Mac


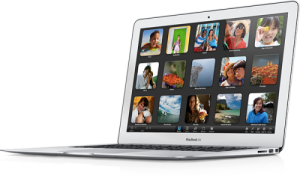
…the 13”Retina Display MacBook Pro with 256GB drive

This is considered to be the perfect combination of the exceptionally lightweight 13” MacBook Air and the ever popular 13”MacBook Pro.  The difference though with the Retina Display Mac is that the picture display is like art- beautiful, vibrant and crisp; the pictures pop right out at you.  These now have the 8GB Memory (a temporary storage used for anything open- including doc’s, pic’s, apps, music, or downloads that you are currently working on awaiting a saving to hard drive).  What having 8GB of Memory means to you is that now you can get more work done at once.  Twice the research, run any program that requires more Memory, enjoy watching movies, play any game, even video editing- is all possible without getting the spinning wheel of “wait”.

Retina iPad


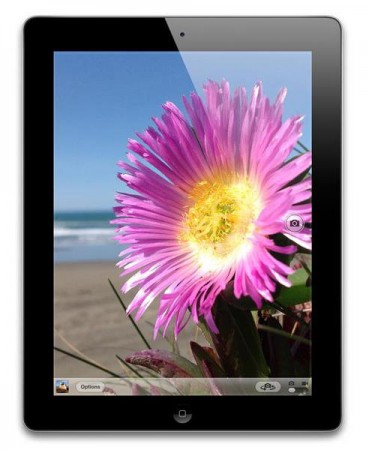
Next on the wish list is the iPad with Retina Display because of how great the display is for graphics- for your movies, pictures and games, slide-shows or giving a presentation at work. This iPad is the perfect companion as a multi-tasking tool for the Graduate going off to work in any of the professional fields.  You have access to email, doc’s, music, movies, internet for research and so much more with the touch of your fingertips- on a screen large enough to work on and beautiful too.

iPod Classic


Last on this wish list is the iPod Classic which has made a comeback in popularity because of its music, video and photo storage capacity. At the 160GB large storage, it is considered  perfect for morning runs, workouts in the gym, or commuting to work and back. 


Friday Quick Tips- Saving valuable time

When you have the chance, preferably when you first get your new Mac or Apple device, create an iCloud account.  Now, you don’t have to sync all of your devices to get up-to-date with all of your content.  iCloud is designed to make available to all of your Apple Devices all of the iCloud compatible content and apps you want to save and share.  Contacts, mail, music, document, reminders, notes & even photos can all be stored in iCloud and shared with all of your devices.  Think of the time this will save you.  Below are two links that will help answer questions and assist with setting up your iCloud  account.

iCloud info Link

iCloud Support Link


Friday Quick Tips-Seriously

Computer Fires!

computer_fireWe recently received scary news that there has been an outbreak of Laptop fires across campus.  There was a warning included which stated that leaving a laptop on a bed or a couch restricts the airflow in the computer which can cause the computer to overheat. Do not leave your laptop on unattended; please work with it on a hard surface like a table.
This is a very important warning to pay attention to.

I would like to offer another warning regarding laptop fires.  When purchasing a charger adapter for your computer, make sure you are not saving some money and getting a cheap one from the internet.  A few students have approached me in the past making sure I warn other students that these cheap imitations have “burned up” their Mac.  Your Mac is worth upwards of $1000, take good care of it.  Insurance does not cover your computer if, by saving yourself some money, you burn the Mac up with a cheap power adapter.  I have seen many students walk away after I tell them the cost of a replacement power adapter from Apple is $79, they tell me they can purchase it cheaper online.   If you see one for less, be warned, it is probably an imitation!  I did some research on power adapters for other brands of computers and they are all relatively that much money.  Do your research and make sure you are getting the correct adapter that will not cause your battery and/or computer to overheat.  Don’t buy cheap!

We value your lives that is why we are warning you with emphasis!

Friday Mac Quick Tips

BACKUP-YOUR-DRIVE

The first thing I want to remind everyone about is how important it is to Back Up your computer.  I have seen so many people leaving with tears in their eyes when the Tech explains to them that all those long hours of research and writing pages for a thesis, mid-terms or finals is gone because the hard drive failed.  BACK UP your computer or just back up the work you do not want lost if the hard drive fails.

Here at the Apple Campus Store, we have noticed an increase lately in the complaints from Students, Faculty and Staff about how slow their Mac is running.  More often than not, it is an easy fix and not necessarily your hard drive failing.  Thank goodness! There are some things you can do to prevent the “Spinning Wheel of Death” that rainbow spinning circle that appears in the middle of a download or while opening an application.  This freeze stops all work you can do on your computer.  Some people restart their Mac after it crashes only to find their Mac won’t turn on past a gray screen.

One of those things you can do to prevent this from happening is free up some of your hard drive space.  After you have backed up your computer, delete some old unwanted documents, movies that you save elsewhere, or even applications you never use.  Some people even have multiple copies of photos.  Get rid of all the duplicates because graphics take up more space than regular data does.

Another way we can help prevent our Mac from slowing down or freezing is to do some spring cleaning of your browser cache.

  • For internet Explorer 8 or 9  click tools menu at top of page, click Delete Browsing History, then unselect Preserve Favorites Website data, but make sure Temporary Internet Files, Cookies, and History are selected.  Then click delete.
  • For Firefox- click tools, then click Clear All History… Make sure Browsing & downloading History, Cookies, and Cache are all selected then click clear now.
  • For Chrome- type   chrome://settings/clearBrowserData  into the browser bar.  Make sure to select Clear Browsing History, Clear Download History, Delete Cache and other site and plug-in data. Then from Obliterate… select From the Beginning of time from the dropdown menu. Then click Clear Browsing data.
  • Finally for Internet Explorer 7 click on Tools at top and select Delete Browsing History, then delete Cache, then Delete Cookies, and finally delete History.

Do this once a month to keep these browsers working better.

FinderAnother easy preventative to a slow Mac is to run Repair Permissions from your Disk Utility. Simply go into Finder (pictured at left) and look for Applications on left side then on right- scroll down to bottom and click arrow beside Utilities. Then scroll down again and click Disk Utilities.  A window will appear that will allow you to choose which Hard Drive you want the Permissions repaired in.  Click the correct one and at the top of that window, make sure  First Aid is selected and click Repair Permissions.

I am including a link to check out from Apple Support about Repair Disk Permissions below.

Apple Support-Disk Utility’s Repair Disk Permissions